
Despite the unfortunate conclusion of our 8 week super-duper slip casting class, the slip-casting excitment continues. If you haven't been reading every single post we've written this year (shame on you!), the class taught us all the steps of casting from start to finish; the goal: to make ceramics mulitples of a form quickly, easily and awesomely.
For the class, we wanted to make something special for L&G and so we decided to create our own original L&G Chalk-It-To-Me piggy bank! Here's a little trip down memory lane of how this little piggy came to be:
 We quickly sketched up (I'm a great sketcher, right?) a simple & minimal piggy with a capsule-like form that I thought would be a nice easy form to cast.
From there it was as easy as 1, 2, 3!!
STEP ONE: Make a master form. In order to create the mold, we need to create a positive "master" pig that is an exact specimen of what we want our cast forms to look like.
Little did we know...the first step of making darn thing was a total ordeal. It didn't have to be...but I just ended up making it that way. Go figure...
I used my first instinct...which is to use our handy dandy laser cutter from Chikabird.
I figure I can draw the shapes in layers and build the form up like a topographical map! This was my way of it getting the form close to perfect versus just making it from clay. Clever right? But In cardboard....not so much. 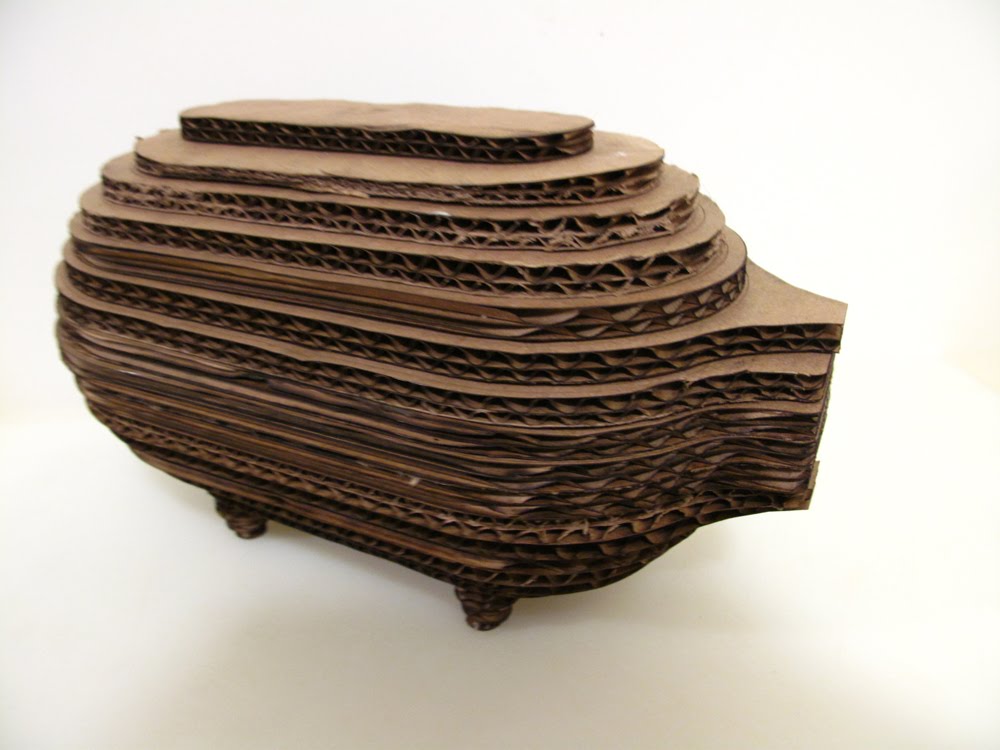 Now you're probably asking why the hell I used cardboard to build the form...that's a very great question. Well....I decided to use cheap-o Sculpey (craft 101 style) thinking that I can roll out the material and drape it around the form, then bake it and sand it afterward!
I thought it wouldn't be such a good idea to use acrylic for the laser form since it would melt in the baking process...and so why not plywood you ask? Well, honestly... I don't know! Why didn't you mention that BEFORE I started making this?!?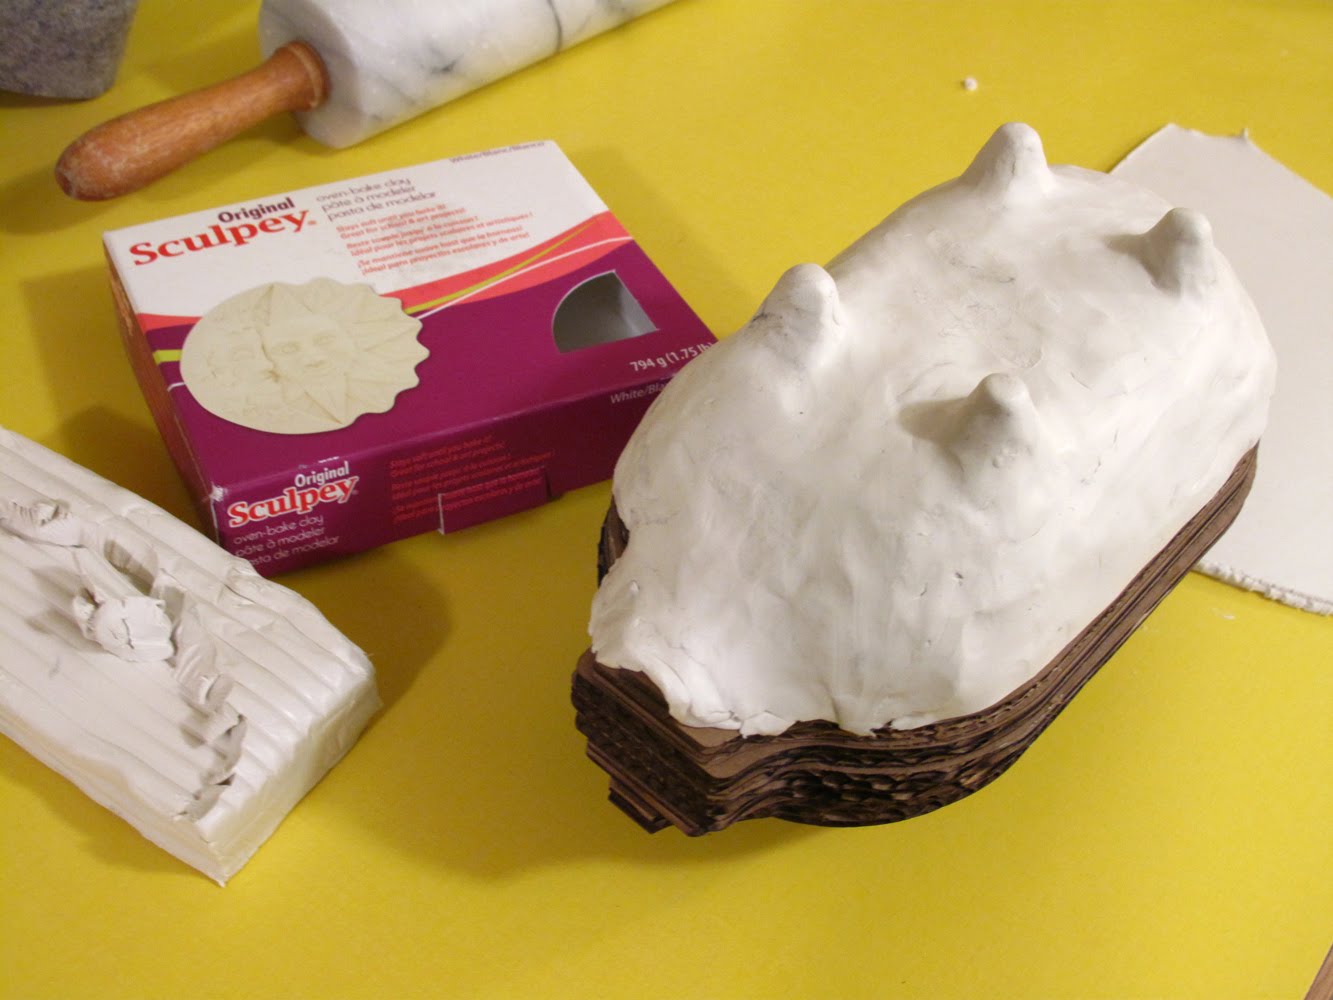 So here it is with the Sculpey draped over. I think the last time I used Sculpey was in middle school or something. I realized there was a reason for that...this stuff is horrible to work with!! Its too soft and I kept making finger marks all over as I was handling it.
 After going through the baking process, the rough piggy form was made. But then somehow there were little cracks that formed because I either baked it for tad too long or there were areas that were too thick! UGH! But by that point, it was no going back, those cracks could be easily filled right?...can't you just feel the suspense?
 Then it was onto the sanding phase. My favorite!! Who doesn't like to spend HOURS sanding laboriously using sandpapers between 100 grit and 1200 grit...and on top of that, I also had to use Bondo to fill in all sorts of indents and fix all the cracks from the baking process since the Sculpey surface was so bumpy. Can someone remind me why I used Sculpey??
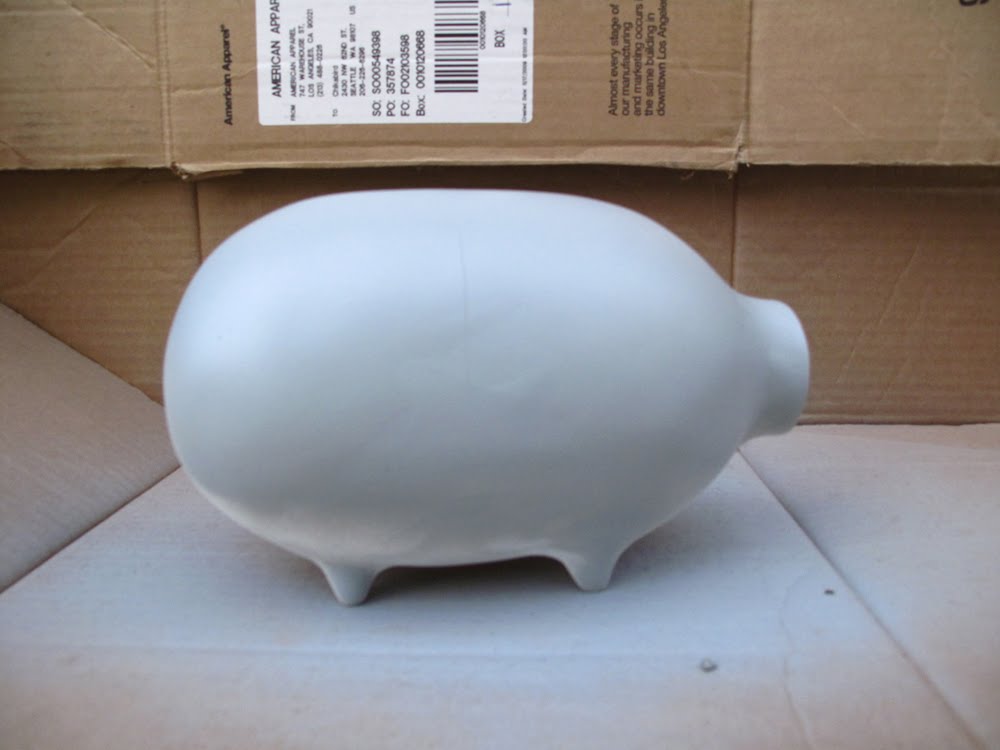 After that it was on to the priming stage. This is where I had to spray the whole thing with primer, sand between layers, and repeat this step for 2 more times.
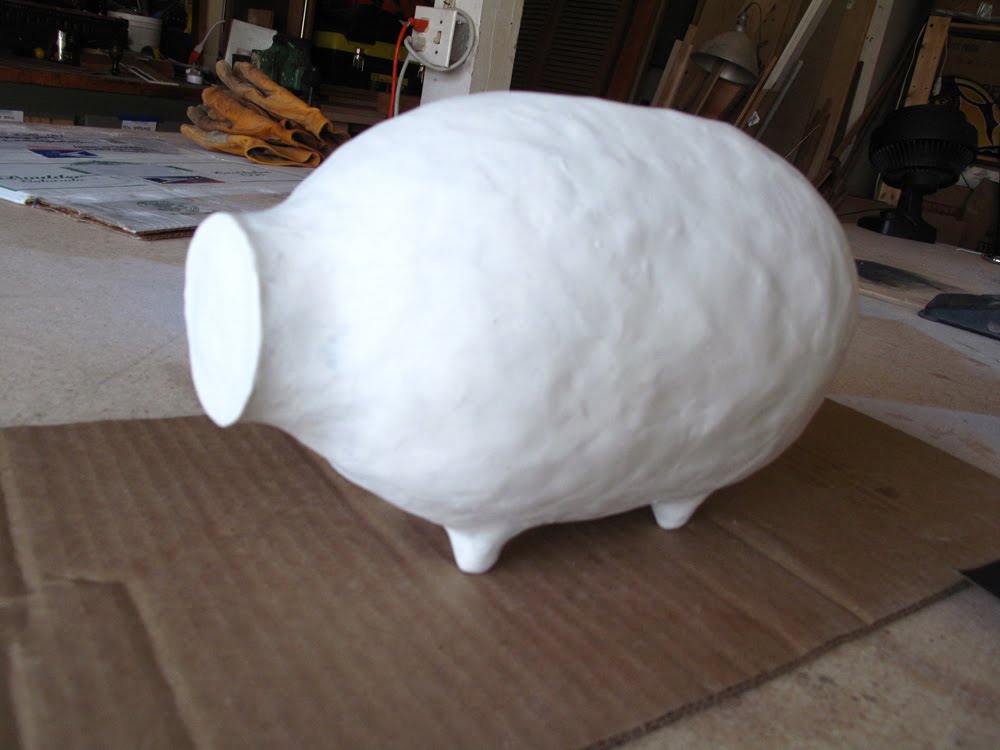
 And Voila! Here's the finished piggy model!
And you think after attending industrial design classes for 3 years that I'd know something about model making!! NOPE! If anything this proves that I shouldn't be making models!
Despite all that, I hope it was somewhat useful to see my process... Since now you know all my secrets and know NOT to follow any of the same steps!
So...now that we're done with step one...
STEP TWO: Prepare the master for mold making. 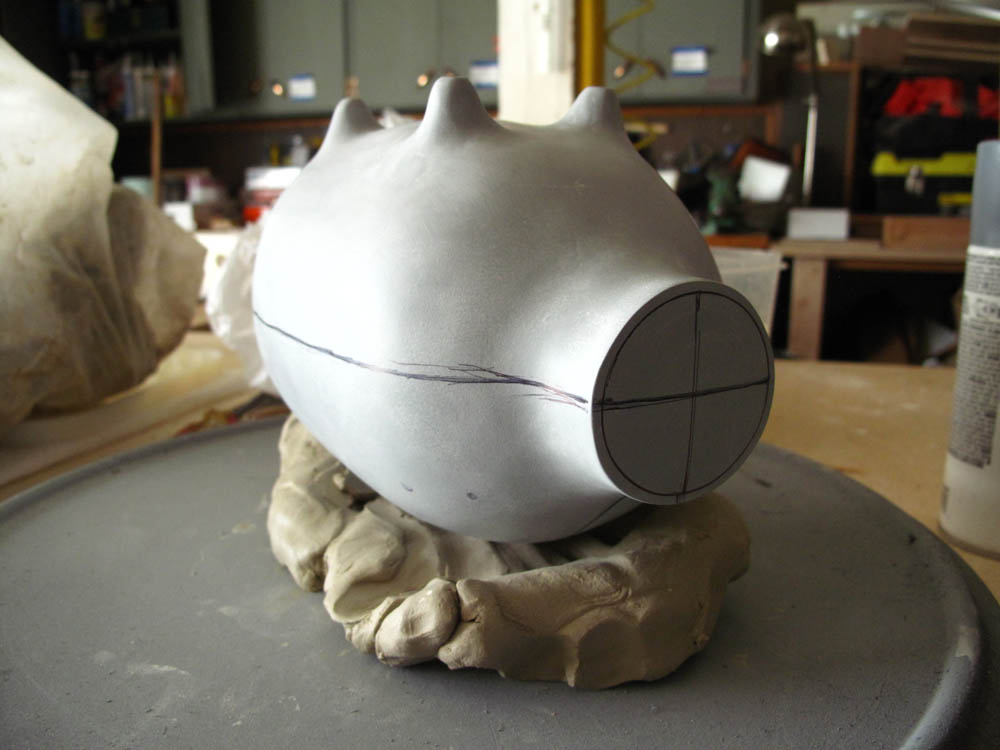 This was actually easier since I just had to carefully build up the first half with clay covering up to where the parting line is (roughly marked on the pig). It was critical to line up with the exact mid-point of the pig.
 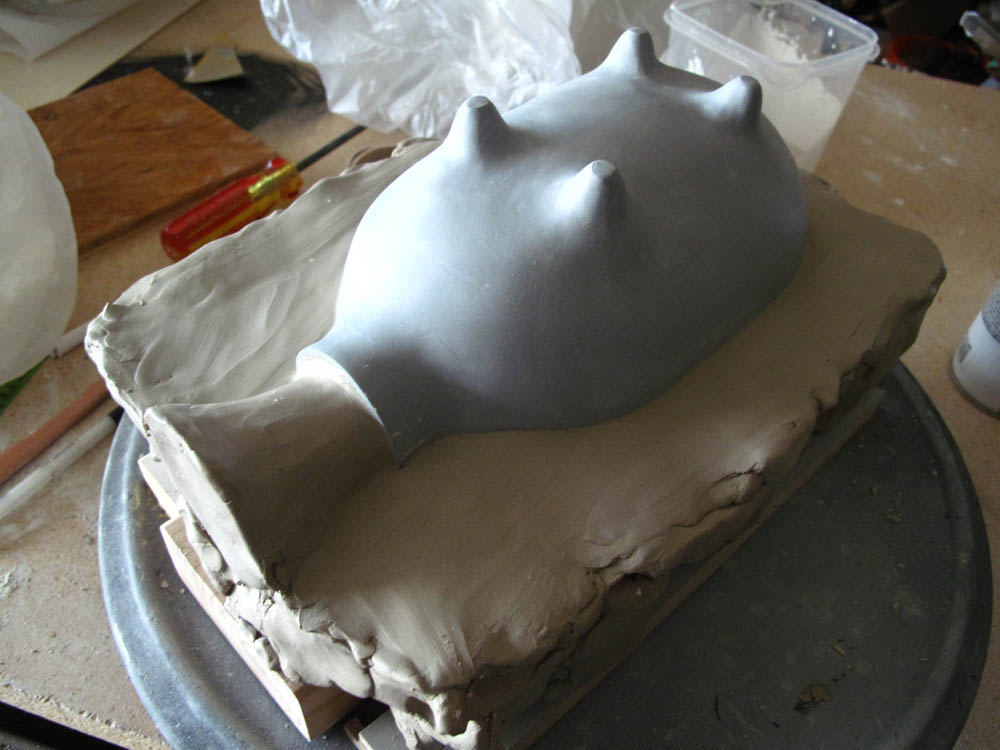 Then it I had build outward leaving about an inch and a half of border around. Lastly, the most essential part...a pouring snout that connects to the pig, which is an opening that will allow the slip to get poured in for the slip casting process.
 After all that, we then used these plywood pieces to build four walls around the clay form. The corners and edges all had the be sealed with clay so no plaster would leak out. The master shape also needed some mold soap so it could separate easier from the plaster.
STEP THREE: Pouring the plaster to make the actual mold!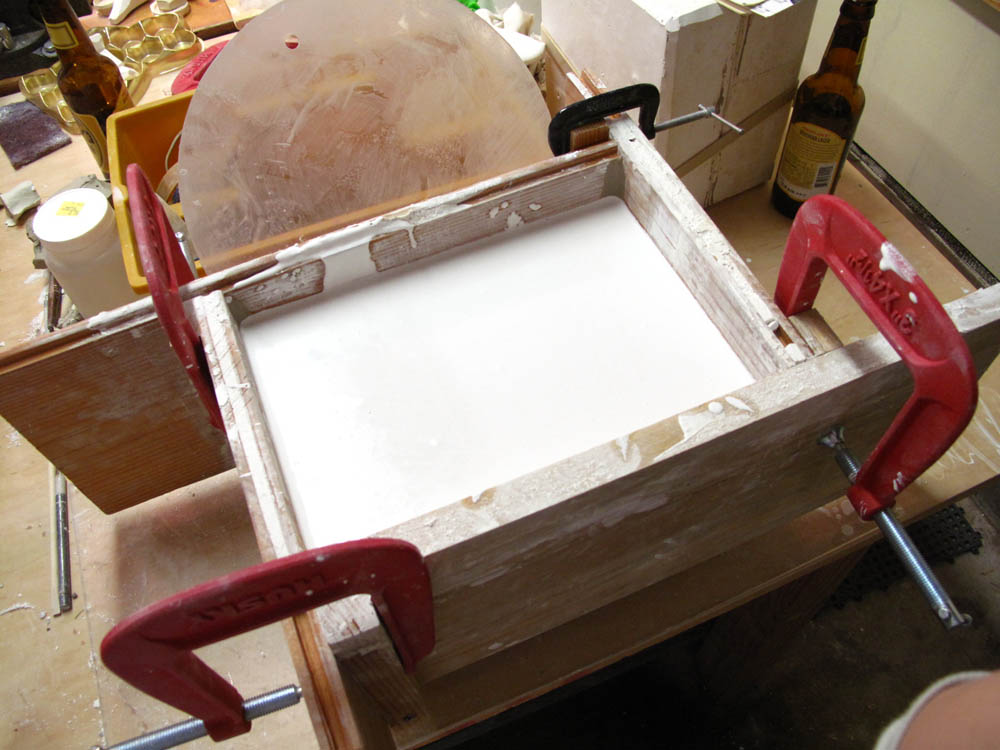 We used special slip casting clay (Plaster No.1) to make the mold. This involved measuring the volume needed and then following some equation of measuring out the 1/3 plaster to 2/3 water ratio. (Here's a WAY better instruction, HERE!) We then poured the mixed plaster in and then let it sit for awhile as it hardened and set. Once its hard, we took the walls off, leaving the master pig in the plaster...and then poured the other side in the same way.
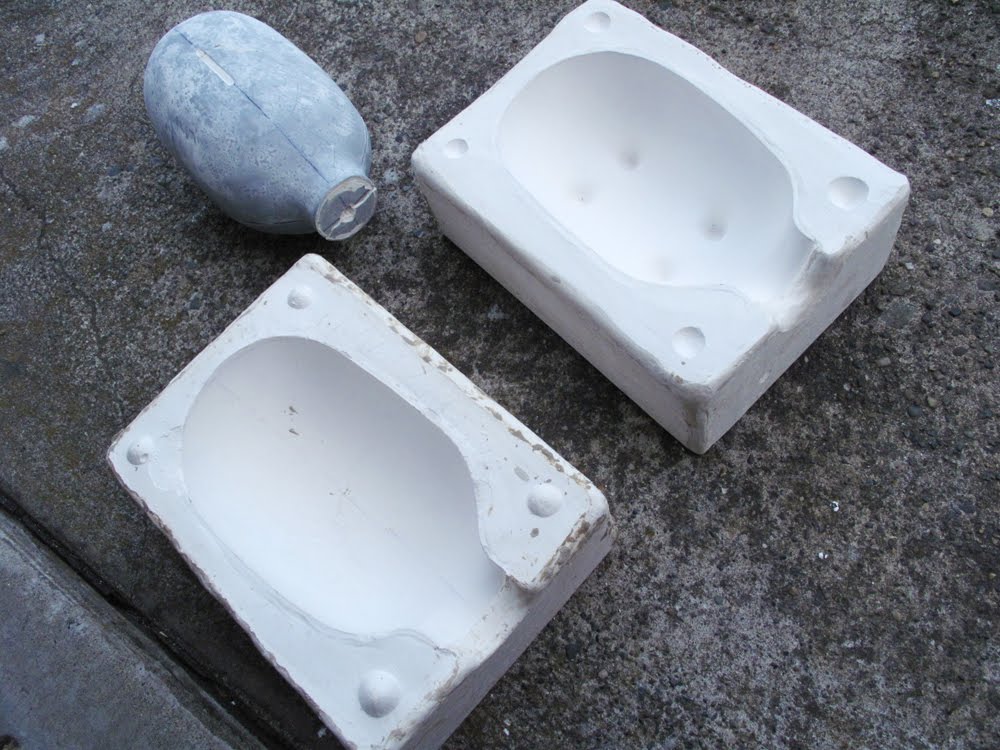 So this is what the two piece mold looks like! You can see the one on the right is the top half, and the one on the left is the bottom half with the feet. Even with all the mold soap-ing we did, the piggy was nearly impossible to get it out of the mold. So we had to use some major force and drill into the snout and pry it out...this made me almost want to cry after all the work that went into it!! But it was either doing that or leaving it stuck in the mold...so...not a whole lot of options.
 So this is what the master piggy looked like with all the cracks all over from all the abuse...not too happy looking. Unfortunately we won't be able to make another mold with this again. Sad...
See? TA-DA! It is easy as 1,2,3!
...It's just that every step required 50 intermediate steps that's all!
Of course this isn't the end of it!! We've still got to show you the slip-casting process and the finished products later!! Just be patient it's totally gonna be worth it!
 Was just going through some photos and found this one that I took when I was last in Taiwan, which I'm especially fond of...
it reminds me that I really need to get my butt over to the beach and start enjoying the summer!
I'm obsessed with these shoes by Marais USA....  and these...
 but honestly, I'd be happy with all this...
 Founded by these two young 25 year old gals living in Brooklyn. Sort of makes me wonder what I did when I was 25. Even though it was only 3 years ago, but for some reason I don't even recall much...what did I do?....thinking...thinking....oh, yeah! I do remember that I didn't do any of this business making, New York living, and designing a whole line of awesome & versatile shoes. Now its all coming back...Yeah, being 25 was pretty awesome.
Now I just gotta get a pair (or several) of these to make myself feel better. I can't choose between these two styles...and the colors....all so nieeeece.....I want to wear them through the summer and beyond....


 This Humorous and mind blowing collection by conceptual Japanese fashion designer Kunihiko Morinaga (better known as ANREALAGE) – debuted his 2010-11 Autumn/Winter collection in Tokyo last month.

 This brilliant collection, "WIDESHORTSLIMLONG" makes you think you're looking at some poorly photoshoped photos while in reality Morinaga had physically distorted every proportion and size by stretching and squishing every detail down to the actual pieces, the pattern, the maniquins, the labels, and even the hangers!
 " For this particular collection, which comprises everything from t-shirts and jeans to dresses and pants, the designer worked with 2 spokes; a wide-short spoke and a slim-long spoke. The wide-short distorts the average height of a Japanese person by 250% (width) and 70% (length), while the slim-long distorts by 80% (width) and 150% (length)."

 I was getting dizzy looking at all the photos....but still amazed by it all!
I especially love how each pieces translates on to a "normal" manikin where the two proportions creates such different look and feel! Doesn't the Burberry-style plaid jacket in wide & stout version look so fabulous & chic?!

via Spoon Tamago
 Neat paper-made pieces by Daniel Sean Murphy.
Simply nice. 

Now if only we can replace all guns in the world with paper ones....

 This Japanese furniture shop, Truck, is incredible. Everything I see on there, I love and want....I want to live in their website.

And this shelf unit....oh dear. 
Via Design Mom

 Can you imagine a world where people can receive postcards and garden at the send time? They're two totally separate unrelated concepts...How is that possible?!?
Believe it or not, this seemingly unreachable concept is now turned into a reality and will forever change how we live our lives!
I hereby present you (someone elses' invention)....Postcarden!!! These are postcards where you can send and grow a little garden!

 This really proves that us humans are truly amazing beings..
With all the great technology we have in combination with our natural desire to push the limit, things that are seemingly impossible are being created every second by great inventors, researchers, designers and more....and every Guinness World Record are getting broken every other day where every other town are trying to create the next world's biggest cookie, pizza or hamburger!!
I suppose this is what makes us so unique....its our desire to always want to reach for the stars....
And indeed are these wonderful Postcarden a great invention of 2010 (for now)! They provide the best of both worlds for people like me who enjoys writing & receiving postcards AND gardening!!
I have to say..I like these WAY better than those creepy Japanese robot inventions they're creating these days. Creeeeepy...

 This really makes me think that anything IS possible.....I guess that's why people always say "Never say never!"
....But there's is an exception....I'm pretty certain that I would never EVER want to eat any world's BIGGEST anything!
This is where two concepts of "food" and "biggest" should NEVER EVER be combined together!!

We're very sad that 8 weeks of slip casting fun is over before we could even blog once about it, so here's a found look back (cue up "Will you Remember Me?" for a graduation-style slide show effect)
After months of much-effective harassment Jean, Chika, Jared, and I finally convinced our dear friend and talented ceramist Heath Bultman to share his skills and wisdom in the ancient art of slip casting. He was gracious enough to open up his tiny home studio and set it up as a classroom for the four of us. To the tunes of JT and Kenny Loggins we eagerly soaked up knowledge, plaster dust, beers, and jokes...not a bad way to spend a Tuesday evening. We started our class making plaster molds of existing objects. Mold making and mixing plaster is an art and science in itself, but with Heath's guidance we more or less successfully created castable molds of a few of our favorite objects.

Me pouring a bud vase made from an existing vessel.

From front to back: molds for Heath's lamp base, Chika's found "snake oil" bottle, my bud vase, Jared's potato mugs (he casted potatoes...what a rebel!), Jean's cork-topped canister.
Jean's handmade gem and mold.
 Jean used here thrifting skills to find this existing mold (above) for bear feet....or cat...or maybe racoon.
  Waving hello...
 Me looking satisfied with my cast piece.
We got more to come....hint. There's gonna be some original L&G piece!
A great project presented by Tanya Aguiñiga. Tanya Aguiñiga is an LA base artist/designer whose been an active participant in the art/design community in bridging the world of design, art, and craft focused on the Latino community. She recently launched the project, Artists Helping Artisans (AHA), to raise money to work in the highlands of Chiapas with Mayan women in hopes to empower the people and preserve traditional & cultural arts and craft.
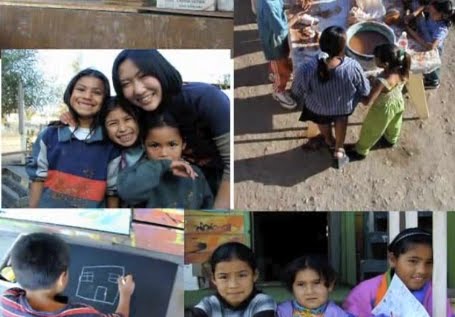 "...Artists Helping Artisans (AHA), will focus on helping artisans in marginalized communities whose craft traditions or livelihoods are at risk. With the current economic crisis, and tourism dwindling, many of these craft communities are in dire need of help."
It's really admirable and inspiring to see that even designers & artists can find ways to foster a better place by giving back to the people. This definilty makes me realize that even as designers we can make responsible contributions or actions that can improve people's lives beyond creating consumable tangible products.
So let's help Tanya help others... You can lend a helping hand and help Tanya to get her project in Chiapas going...and it's true...Evey contribution helps.
Donations can be made in increments of $10, $25, $50, and up to $2000 if you're feeling really generous! And with every donation, Tanya will even send something special made from her or from the artisans! Donate $50 and receive a hand felted bird by Tanya.
 Donate $100 and receive a small Chiapas artisan made work and Limited Edition 11x14” print made by Tanya.
Read the full project description and make donations here. Besides sharing the AHA project, it's also important to share Tanya's work! I first discovered her when I had the pleasure to meet Tanya at a craft show in SF back last December. Seeing her stuff was a total highlight of my trip! Not only does she creates beautiful one-of-a-kind handmade design furniture pieces, she also creates these beautiful dipped dyed rope jewelery that were more than amazing. I was literally hovering over her booth for an hour looking and trying everything on!
 Dipped dyed bracelets with bright saturated colors.... I had to get the teal one! I realized that this bracelet was mentioned along with my doily rug back when Meg Mateo guest blogged on D*S!
 Yeah...I couldn't help it..but I had to get one of these dipped dyed rope necklaces, too!
Check out her shop! and yes.... she's hand-felt these folding chairs... Gawwwd....
 I love how this chair looks like a loom.
 Found this via D*S' sneak peak with Fitzhugh & Lyndsay in their Brooklyn home. It's amazing to see people living in spaces like this in NY. Makes me wonder how they are able to have such an amazing space...perhaps I'm better off not thinking about that stuff....
 The space feels so crisp and warm at that same time. For the longest time I feel like white is so boring....but I'm starting to realize the reason why people go with white. White...feels so pure, bright, crisp, soothing, and versatile all at the same time! Especially with the use of rustic wood accent through out, their space is anything BUT boring!
 I dream of shelf space with a giant ladder like this all the time....
 I also like the hint of cleverness such as this rustic sliding barn door for their bathroom. I'm always a little farm-envious, so perhaps just getting a door like that would make me just as happy.

 Holly mother....I'm in dire need for a pair of frames...and I think I just found my dream glasses.
These gorgeous wooden frames are handcrafted by a Dutch company, Herrlicht, and each of these babies only cost about $1000....
There's no way that I can just get one pair...Its ALL or NOTHING!! That's just how I roll....it's really not because I can't afford it or something silly like that. That's just crazy talk...
via seesaw

 Our friend, Herman Yu informed us about LIndsey Adelman's work and her beautiful molecular-esque chandeliers. The combination of the organic blown glass shades and the machine-like metal brackets creates such a wonderful contrast and a beautiful sculptural piece.
 They seem to fit so well in both traditional and modern interiors.
 But what's EVEN more amazing is that Lindsey also provides a whole how-to-instruction with all the parts needed on her site, so you can create one of these beauties yourself!!
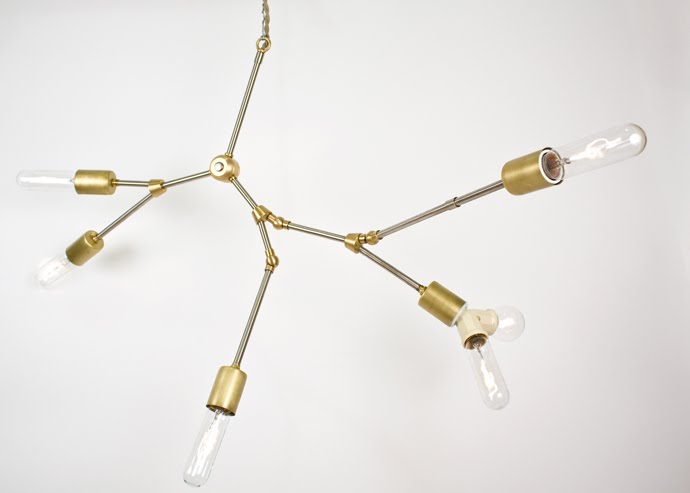
 I really want to try it!! It seems a little involved, but with some time, patience, some skills in wiring, and tolerance for couple of electric shocks ...I'm sure I'll be able to make one of these!
It'd be TOTALLY worth it!


 Designer, Ana Kraš from Serbia designed these series of fantastic Bonbon lamps with various simple lamp frames and strings. I love the warmth and the lightness of the strings and how Ana uses various colors in sections. I also love the retro feel of the styling. I love it all...
 great detail of how the cord threads through the frame.
 Via Blosem
 It's been a while since we had any L&G news, but Mega Doily rug just got mentioned on Better Living Through Design (BLTD)!!
It's funny to be talking about this since I'm actually in the process of making a rug at this vary moment...and I have to say, as much as I'm excited to have my rug featured on the blog, I'm really sick of looking at this rug. My hand hurts right now....ow.
The lovely photo of the rug was taken by the wonderful folks over at Fancy (Thanks Sally & Erich!) and they also just launched their new website with lots of wonderful new design! So go check it out! Job well done guys!!
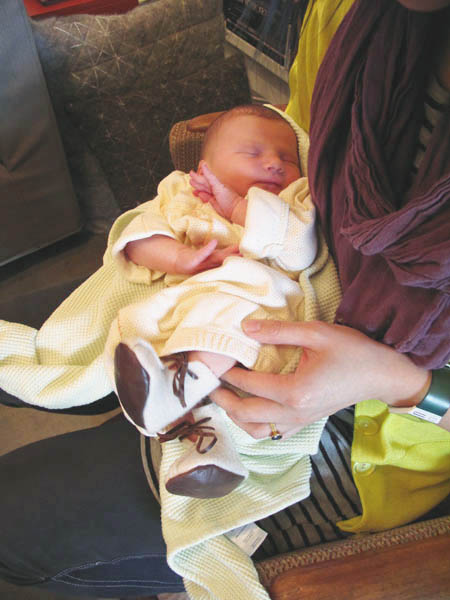
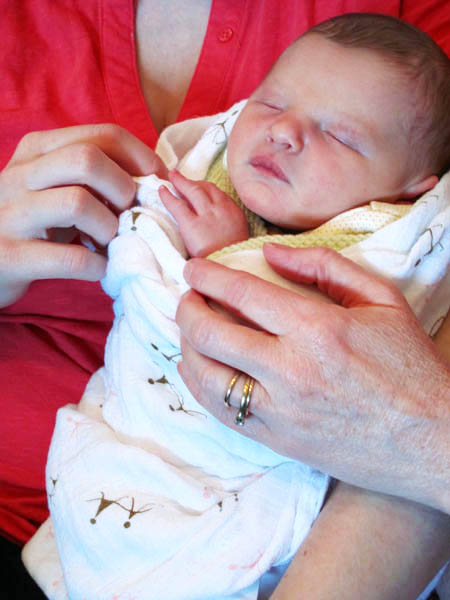 I posted about the little felt slippers I made for little Clara (the new addition to Piano Nobile)....and I just like to show you some photos of adorable Clara wearing them!
 Me holding her as Clara poses in her sleep...
 I love how she was totally fine with us messing with her while she's sound a sleep. I was even tempted to draw some mustache on her, too...but we decided not to go there....she might grow up hating me. :P
We all know about L&G fascination with felt... and we're of course suckers for "how it's made videos"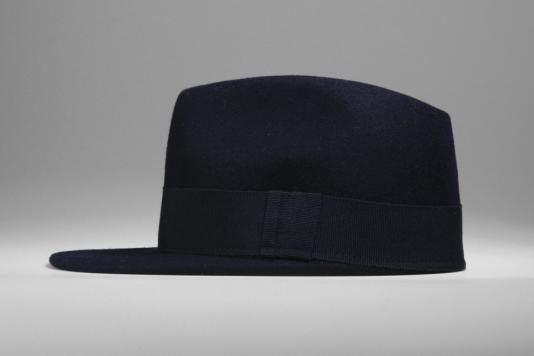 So, let the two collide here in a great little video on the making of a felt fedora. Enjoy:
Soulland // Making the Adler Fedora from Soulland on Vimeo.
via selectism

 This is a barn that's been converted to an amazing house by a Seattle based architecture firm, SHED.
I love the rustic charm of barns in general. The fact that they turned an already wonderful barn into something even more awesome makes me furious!
(only because I'm jealous that someone is living in a space like that...and I'm not. boo on them)
 Love the wood siding used for the interior. So nice....
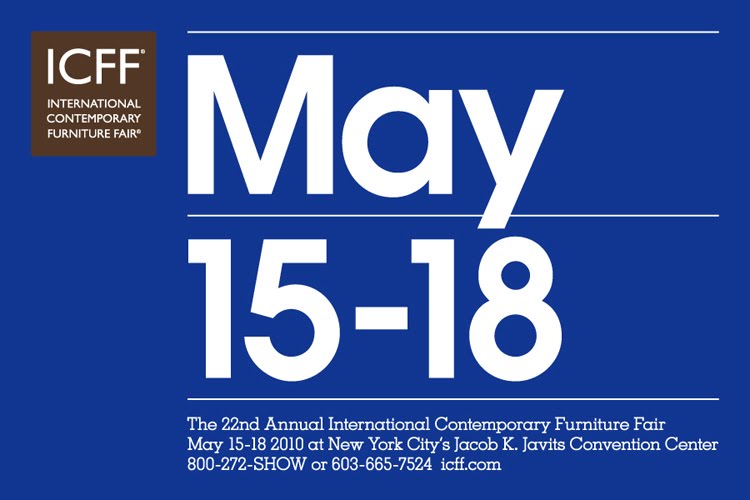 Our friends from JOIN Design Seattle are gearing up for International Contemporary Furniture Fair (ICFF) in NYC from May 15-18. We wish we could go to NYC just to check it out in person!! Unfortunately we're missing it again...sigh.
But lucky for us, these 7 design firms below have thoughtfully planned a preview party in Seattle TONIGHT for the less fortunate people like us who cannot attend the show. Woo Hoo!!
+ KERF
+Yuri Kinoshita
+ far4
+ Iacoli & Mcallister
+ 16th Workshop
+ urbancase
+ graypants
THURSDAY, APRIL 29TH
6-9PM
5813 AIRPORT WAY SOUTH in Georgetown


 Dutch jeweler, Gensine Hackenberg creates these simple yet clever ceramic jewelery pieces by literally punching circles from existing traditional chinaware. The concept and the pieces themselves are seemingly simple, but the juxtaposition of the old and the new is thoughtful and more than well executed.
It's all about seeing the origin of the material and the story that she's created for both the tableware and the jewelery pieces together that makes the concept more than ordinary.  I love using existing objects and transforming it in whatever ways. It's part of appreciating the origin, story and character, and at the same time giving the object a whole new life and value.

 This sounds like a fantastic print show!
:: SPRING 2010: GOODBYE EDITION ::
OPENING NIGHT: Thursday, April 29, 2010, 7:00-8:30pm
Parnassus Cafe in the UW School of Art Basement
'Goodbye' Limited Edition Hello Posters will be on display in Parnassus Cafe through May 2010
Poster will be sold in person opening night for an incredible price of $10 each.
All proceeds will benefit local charities. Full details, here.
Brought to you by the UW visual communication graduates, Ben Shown and Alanna MacGowan. They first initiated the "HELLO Poster Show" last year exhibiting over 30 silkscreened wonderful prints inspired by the greeting 'hello.' as a fundraising event.
Here are some of my favs from last year. You can see all HELLO prints here.

