Viewing entries in
L&G Mentions

3 Comments

Guest Blog on Poppytalk for the New Year!

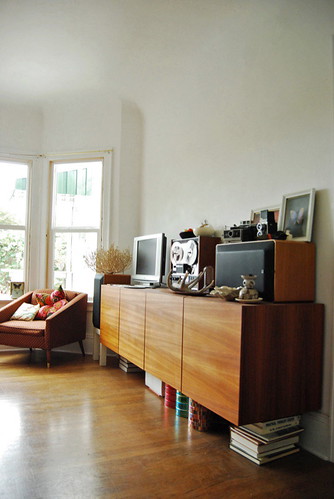
This week Jan from Poppytalk invited L&G to be a guest blogger!! Hurray! Dylan and I are super excited about this one where it's about celebrating the new year. It's a instructional post about creating an easy and impressive mix-your-own cocktail bar. What is this about??
Well...to summarize it, it's about expanding your New Years drinking options that's beyond cheap champagne. It's about making the guests feel like they're participating in something fun while in reality, it's about you doing less work and having more fun at your own party for once. And even with you putting all your guests to work...you'll still be rewarded by the praises from your guests. You can say BOOH-YAY! to that my friend.

Read all the details on Poppytalk about how to make this into your reality!Here are some drink recipes to jump-start your ultimate New Year celebration party!
Irish Coffee (via Drinks Mixer)
15 oz Irish whiskey or Irish Cream
10 tsp brown sugar

60 oz hot coffee
Heavy whipping cream
Cocoa powder
 

Make the coffee (stronger the coffee the better), add sugar and mix Irish cream or whiskey (or both!). Mix. Whip the whipping cream. Put whipping cream and cocoa powder in separate bowls on the side.

Oolong Infused Ginger Plum Wine (L&G Recipe)
1/2 cup of Loose Oolong tea leaves

10 cups of water

1 bottle(750ml) of Plum Wine
1-2 inch chunk of fresh ginger based on preference

ginger ale on the side (My favorite is the Organic Santa Cruz Ginger Ale…it has real ginger! It makes 10 times better.)

Prep the tea the day before. But if you don't have time, cut the water amount in half and add the other half with ice instead. Brew the loose tea leaves with hot boiling water. Let it steep for 3 minutes. Strain the tea leaves, Simply add the plum wine, chop/shred the ginger. Mix it all it in a pitcher and there's your mix. Put the ginger ale on the side in an ice bowl to keep it cold.

Lemon Mint Sparkling Mimosa (L&G Recipe)
1 750ml Bottle Champagne
16 oz Lemonade (blood orange or grapefruit juice are also fantastic)
½ of fresh mint
2-3 Lime or Lemon
1 pomegranate

Tonic water

Mix Champagne and lemonade in a pitcher. Chop and crush the mint and add it to the mix. Put the lemons or limes and pomegranate in separate bowls on the side. Put tonic water on the side in an ice bowl to keep it cold.

It's easy to create your own concoction as long what your mixing all goes well together. You can add Mexican hot chocolate with coffee and coffee liquor, or use different fruit juice and fruit with vodka or gin.
But if anything, Martha always has tons of good cocktail recipes! And at Drinks Mixer you can find thousands of drink recipes...from the classic drinks to the really unheard of ones...anything you're looking for, they have it all.

We hope that this can come in handy for any celebrations! Happy New Year!


3 Comments

Comment

Oh My! L&G on Oh Joy!

L&G got blogged on one of my favorite blog...Oh Joy! Joy's blog shares an aray of inspiration from handmade goods, to international designs, to homegoods, to fashion and beyond. Not only does she have a fantastic blog, she also has her own line of beautfiul paper goods, Nantaka Joy and runs Oh Joy Studio. Just reading about her client list, accomplishments and work makes me feel like I'm the biggest slacker! I feel shameful.....How does she manage to do it all?!....only god knows...and I suppose Joy herself would know, too.

In any case, I was thirlled to be mentioned on her blog...or should I say that I was more overJOYed! eh?


Comment

2 Comments

L&G on Decor8!

Yay! L&G's exclusive holiday ornaments has just been featured on Decor8 with her weekly etsy take five Tuesdays! Holly from Decor8 has super wonderful taste, so I'm thrilled to be mentioned!
These L&G ornaments are made with 1/8" birch plywood and vintage wallpaper that I've collected over the years. They been mostly sitting in a pile...as much as I love having them around, I'm much happier making things with it!

I've been getting into the whole holiday season and is brewing up all these ideas and projects. So stay tune for more things that's gonna make you feel all warm & fuzzy inside. :D


2 Comments

11 Comments

A Bitter Sweet Farewell to L&G Apartment

Poppytalk once again has generously allow L&G to participate in submitting a post on their wonderful blog. Last week, I did a cooking with L&G post, and this week I finally was able to get my act together in taking photos around Dylan&I's apartment and and answer some fun questions for PHM Studio Spaces post!
Doing the post motivated us to do a farewell photo tribute (more photos!)to our first and probably the coolest place we lived together. Yes....we're saying goodbye to this amazing 1905 apartment in the middle of Capitol Hill, Seattle. I know it may sound crazy....and we assure you that it's for good reasons...we got a house!! It's totally a great thing...except it's just a little sad leaving the high ceilings, the old world charm, the claw foot bathtub, and the large kitchen....sigh.We can't really complain, because we're moving to Ballard, which is a wonderful area close to a bunch of new great things! It's a great Scandinavian community with a fun little Nordic Museum and Scandinavian Grocery shop . It's close to the beach, the best Sunday farmer's market, downtown Ballard with great shops and art walks, bars, and even thrift stores! We just have to keep reminding ourselves of the good positive things, even though we're moving into a not as cool of a place....soon enough we'll make it awesome!

Which reminds me one good thing...we get to pick paint colors for the walls and hang as much stuff on the walls!! I'm totally stoked!! and the kitchen....Dylan's getting excited about re-doing our kitchen plan with his Henrybuilt skillz....yes..spelled with a "z" to emphasize that it's not just any skills....as he has already made the first HB teak credenza for our living room!!There shall be lots of post about all our house renovations!!


11 Comments

4 Comments

Cooking with L&G on Poppytalk

I did a cooking post for Poppytalk today on a Greek-themed meal we made the other day using some recipes from the NY Times Magazine. My favorite is the bright pink fuschia colored beet tzatziki...and no....it's not just because of the color...it actually taste good, too! But that fuschia....it's just mesmerizing and pretty to look at...so bright...and pink....

Read the post here for the recipes and more!


4 Comments

Comment

Blogged on SFgirlbybay!!

I just found out that L&G got mentioned on one of my favorite blogs....SFgirlbybay! I was very close to meeting the lovely writer of SFgirlbybay, Victoria, but I missed her! She was at the SF Renegade Fair and came by Chikabird's Booth and snapped a photo for her review on the event. I was so close!
Maybe some day...some day....
Thanks for the shout out, Victoria!


Comment

Comment

Hang it up!


So I've had people ask me where to get vintage pant hangers since the blog mentions (Poppytalk, Readymade, Apartment Therapy) of our living room display awhile ago, and now they're available on L&G shop! Enjoy!We also wrote up an instruction about how to build the wall grid. It's really simple. Depending on the material it could be around $50 or less. We used cedar 2"x2" and it cost us more like $75. and took us half an afternoon to put it together.


Comment

1 Comment

L&G On a Blog Roll!

So check it! L&G got on the READYMADE blog!! ...I didn't even know they had a blog! Totally awesome! Once again, Jan from Poppytalk who's always in the know (I'm obviously not...), mentioned that readymade wrote L&G up! Woo Hoo! I really gotta say, if it wasn't for Jan and her great blog I wouldn't even be here blogging about being blogged! Big blog hug to Jan! \(^-^)/
Best of all, readymade used the grid and the hangers as an "idea worthy"example for the next MacGyver Challenge: Clothes Hangers , the challenge is due on July 21! Sounds totally fun....I should come up with something for that! Hangers do just take up space and they're usually not that appealing....especially the plastic ones. eck! But they do coming handy when you want to get spiderwebs off the ceiling corners.....or something....hmmm. Something tells me that readymade won't really like that idea....I suppose I should go back to the drawing board. (FYI, I don't really have a drawing board...that would be silly!)


1 Comment

5 Comments

Our livingroom on Apartment Therapy Blog!!

So it has been a super exciting week for L&G, because not only did Jan from the Poppytalk Blog write a nice entry about our living room display, but Apartment Therapy (Chicago) also used it as an example for a display idea! I was floored when Jan passed that information to me! Thanks Jan!

There's been several comments and inquiries about the couch and here's a little info about it! The couch is a Knoll couch with a parallel bar base that Dylan scored on Craig's List (for a mere $125...they didn't know what they had!). It was originally a couch in the Seattle Public Library and was covered in hideous brown naugahide.....eew, I know. We had to get it reupholstered and chose a Knoll fabric called Alignment in blood orange. We were able to get for cheap on Ebay for only $9.00/yd. I love Ebay.....and Craig's list.
Those curious about the display grid: The grid is easy to construct with standard 2 x 2's from a local lumber store (they're actually 1.5" x 1.5"). We chose cedar because we liked the color and consistency. So here are the steps...pretty simple, but the main thing is that there aren't any visible fasteners.

  • Lay out the grid's verticals according to wall stud locations maintaining asymmetric spacing. The horizontal elements are arranged according to the desired height of shelves and prints.
  • Set the grid up on the floor and screw it together from the back.
  • To attach to the wall, we cut 4 short blocks of 2x2 down to about 1 1/2". Screwed each of these to the wall at a stud from the end to align with the grid.
  • Use L-brackets to attach the grid to the blocks...because of the height of these, the brackets are hidden from view.
  • Shallow shelves (up to 8" deep) can be cut to the width of each bay and screwed down from the top with nice looking screws (screwing down is much stronger than upwards from the bottom).
  • Decorate & Enjoy!


5 Comments

10 Comments

The Wonder of Pant Hangers

I came across Poppytalk's blog entry about using pant hangers to hang prints and how it was in the summer issue of O at Home Magazine! I thought it was kinda funny since I started using pant hangers years ago just as a budget solution to hang my collection of prints. Little did I know that even Oprah thinks it's a good idea!! I feel so special...I mean, it's OOOH-PRAH we're talking about!
The way they photographed the hangers with charming old photographs was definitely more sophisticated looking than my jumbled arrangement. I love pant hangers myself and think that they are elegant, well-designed utilitarian objects. I have a whole collection of vintage hangers in all different sizes, materials and forms.
But I was super psyched to also see that Jan from Poppytalk blog wrote a nice entry about my display!! So awesome!! Thanks Jan!!
Dylan and I built this grid on a project day because our landlord is strict about what we do to the old 1905 lathe&plaster walls in our apartment. So we came up with this simple grid for us to change things up easily.


10 Comments

Comment

L&G on Poppytalk!


Jan from Poppytalk blog posted a couple of things from L&G on Feb 28th!! How exciting! Thanks Jan!
I'm starting to sell on PHM (Poppy Handmade Market) store starting March 11th. There's tons of great things, which got me totally tempted. But I pulled myself back from buying things.....for now.


Comment

1 Comment

L&G on DESIGN SPONGE!!!


WOW! I just found out that L&G was featured on design sponge!! I'm a HUUUUGE fan of D*S Blog and so this is a great honor to be featured on there along with all those other amazing stuff. I was practically jumping off the wall when I saw my store featured on there, especially when I only started L&G a week before the posting! This is super encouraging!

The posting was on Jan. 24 titled 'Vintage Kitchen'! and then a posting on Jan 31st Titled 'Before and After Mid Century Hutch,' in the top left corner there's the same Taylor Smith & Taylor casserole dish I sold on L&G! I was wondering how the number of people who hearts my store went from less than 20 to 160!!! I think it was all because D*S.....well...I know it is!
Thanks Design* Sponge! I heart you!! -3- Muah! (that's a face doing a kissy face)

Oh! They also have the same mustard color Mikasa sugar bowl in my store, too in the upper right corner! I like their teal Mikasa salt and pepper set (lower shelf) as well. Such sweet colors...
-Jean


1 Comment