Viewing entries tagged
home renovation

Comment

Dupe Home Tour on Apartment Therapy

You may or may not know that Dylan & I live and share a duplex with our good friends, Jared & Chika, and baby Lisle!   We were lucky enough to be chosen by Andie Powers ( co-owns Assemble )  to have both of our  place featured on Aparment Therapy recently.

LG on Apartment Therapy6.jpg

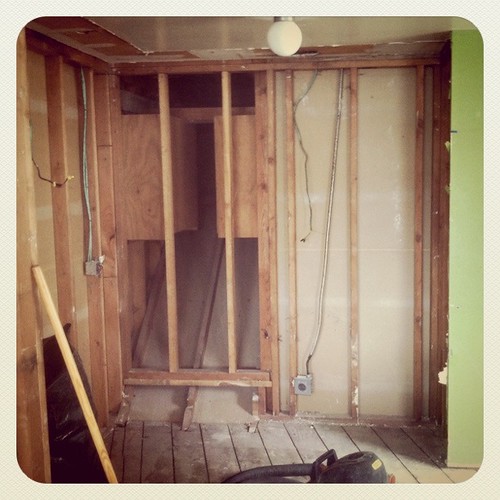
​We share a 1960's duplex  in Ballard, Seattle.  Under this one roof, there are two units,  two couples (Chika & Jared on the left, Jean & Dylan on the right) , two studios (

Ladies & Gentlemen Studio and R&L goods), and two babies ( C&J's precious baby name Lisle and J&D's whiny cat, Pudding).  

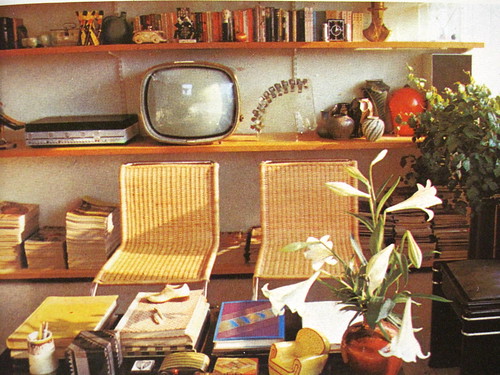
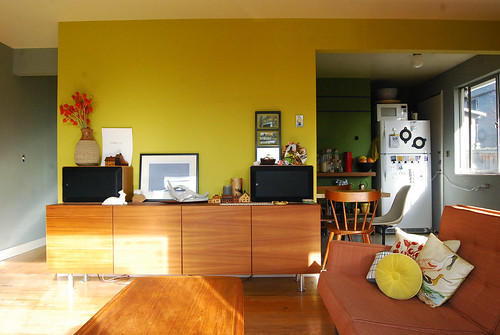
Here's Jared, Chika & Lisle's colorful inviting home. We admire their brave use of bright fun colors throughout their space. They also have the best collection of coveted artworks, heirloom items and furniture.  

Check out the rest of their lovely abode on AT, HERE!​

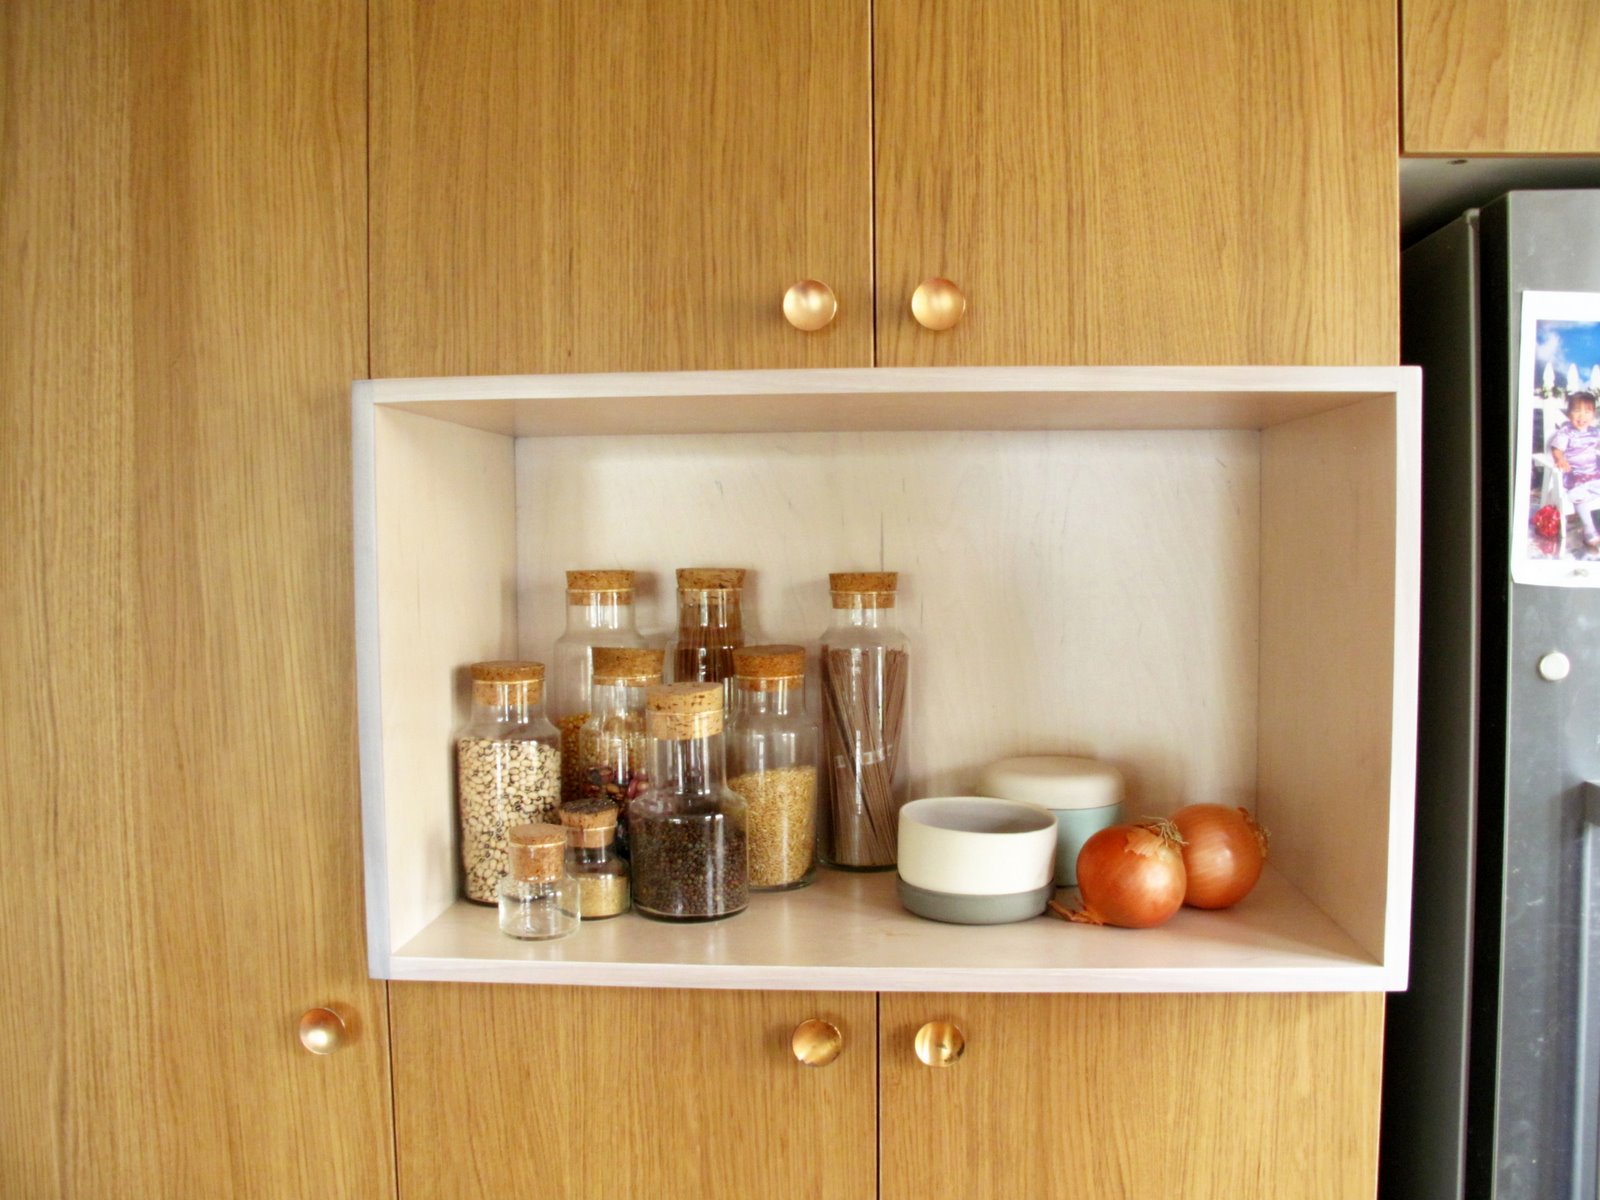
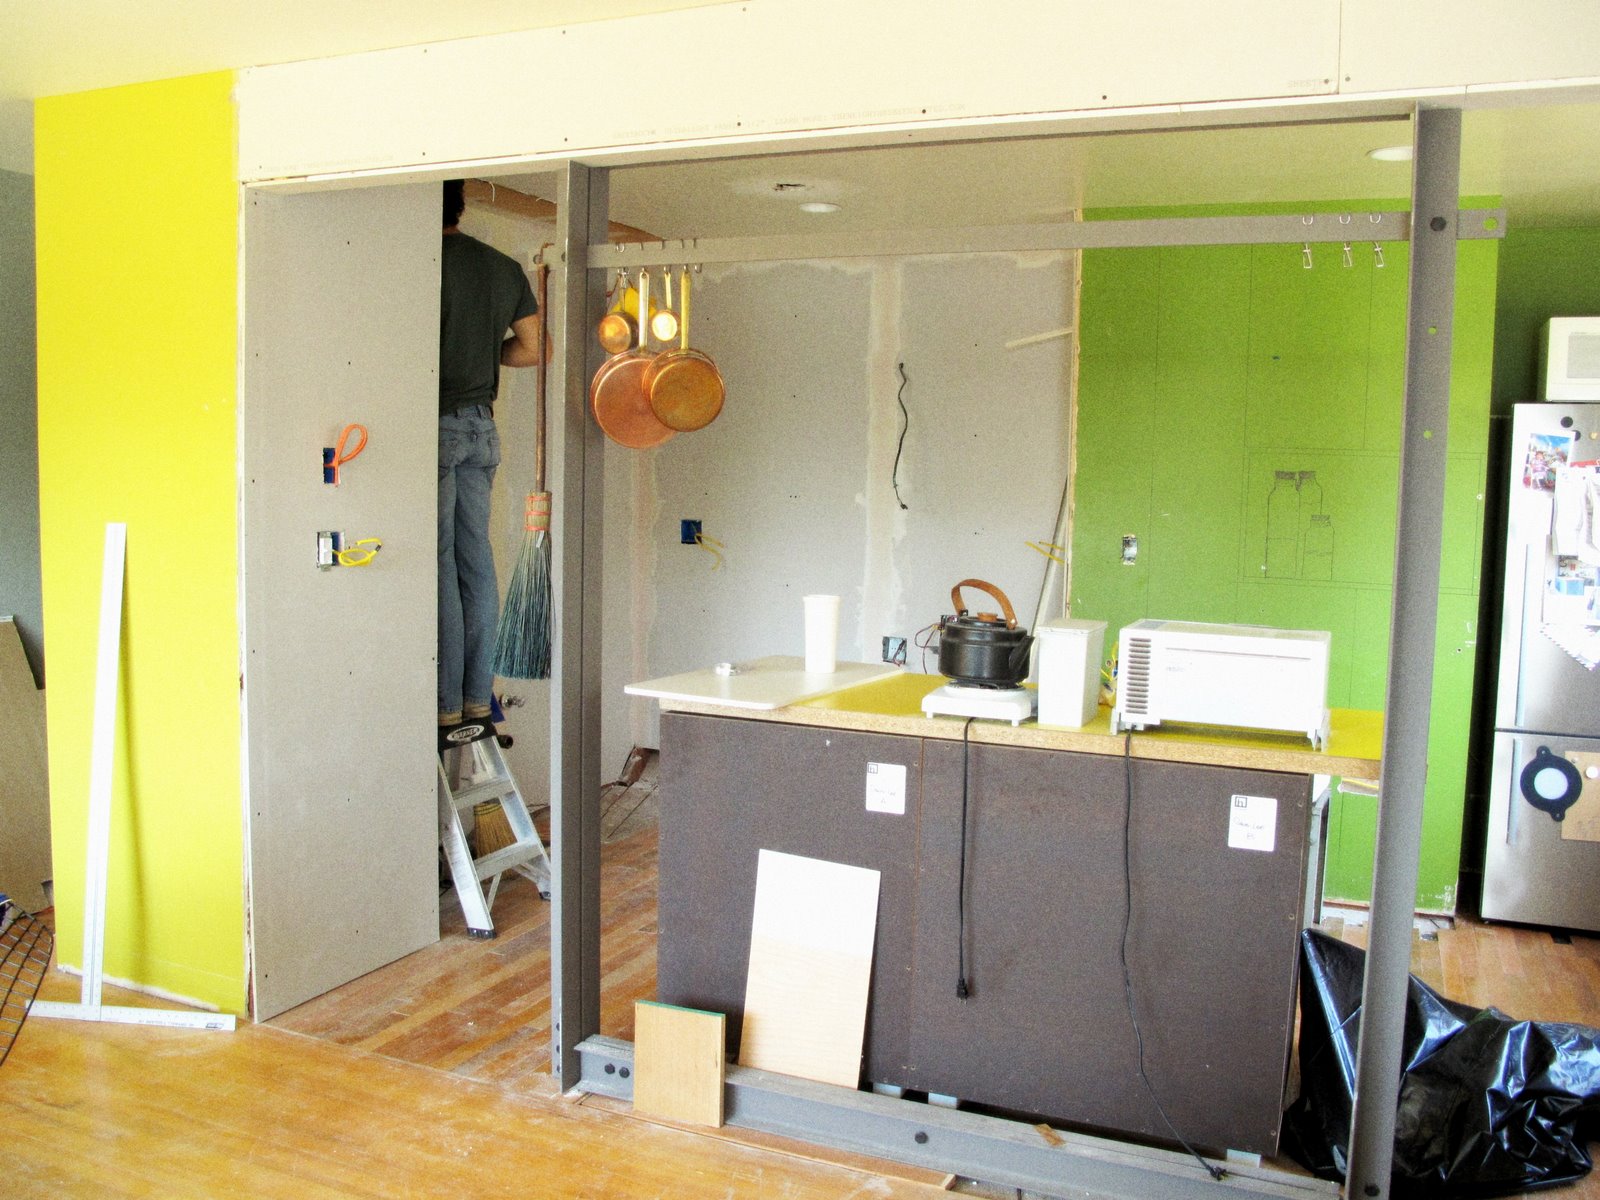
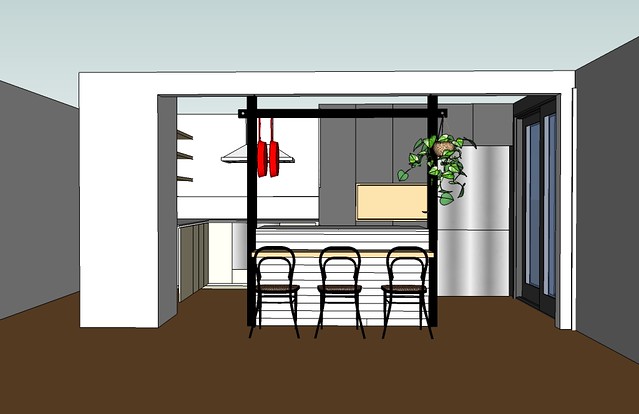
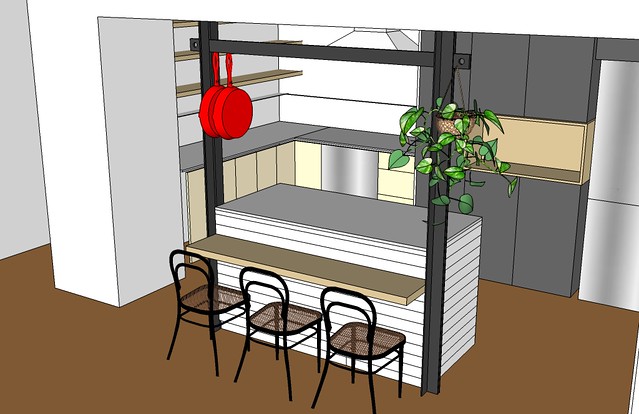
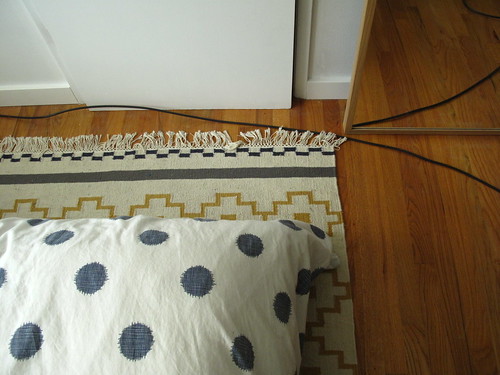
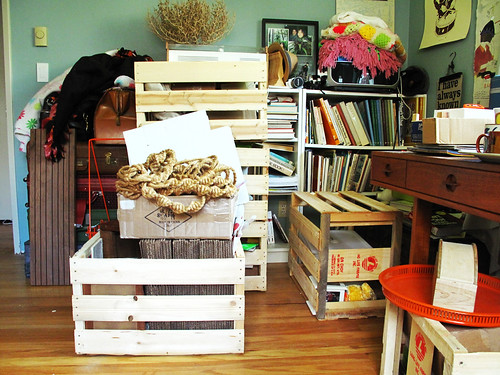
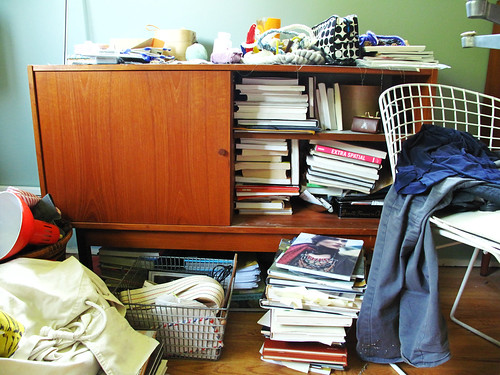
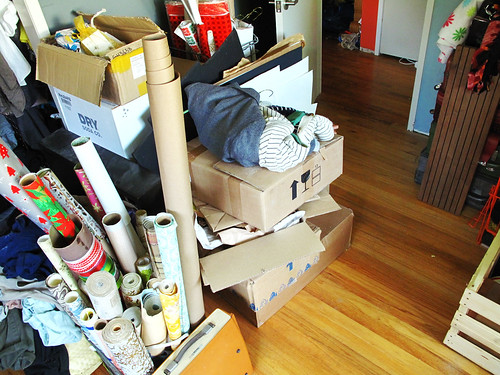
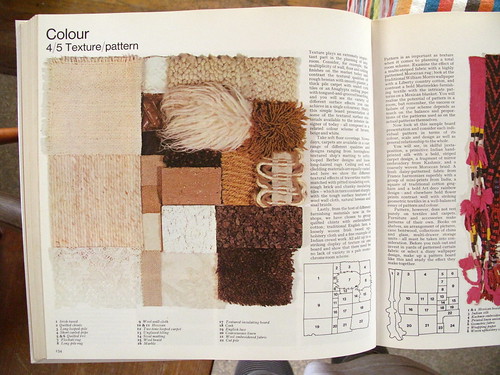
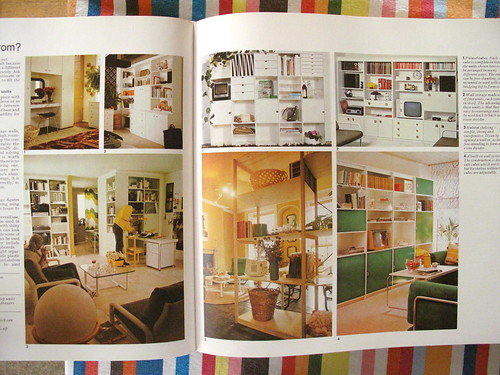
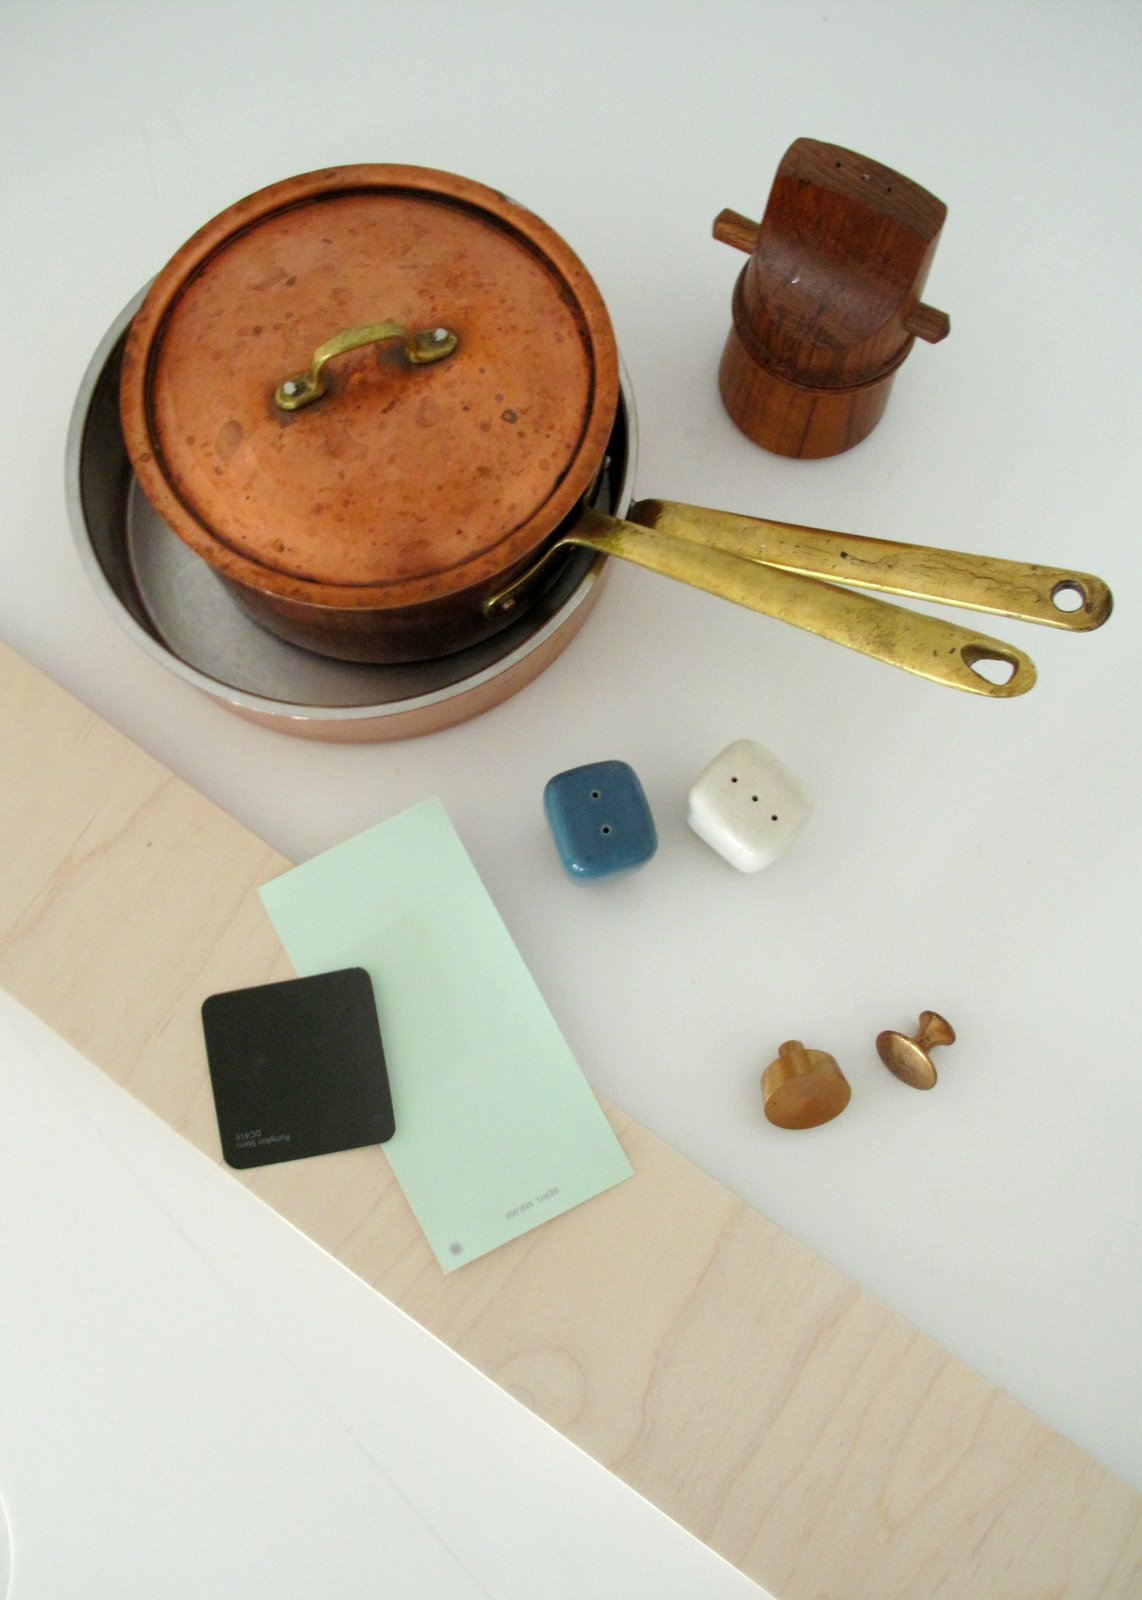
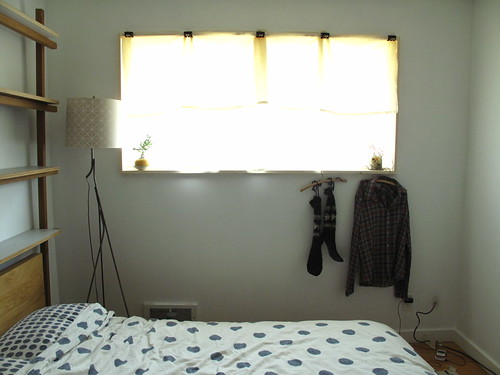
Our side on the other hand is all about floating open shelves...It's not entirely untrue to say that we just don't know how to edit down. For us, the shelves really functions as our 3 dimensional inspiration board where we can be reminded of all the things that inspires us whether it be things that our friends make, vintage treasures we found or material swatches. 

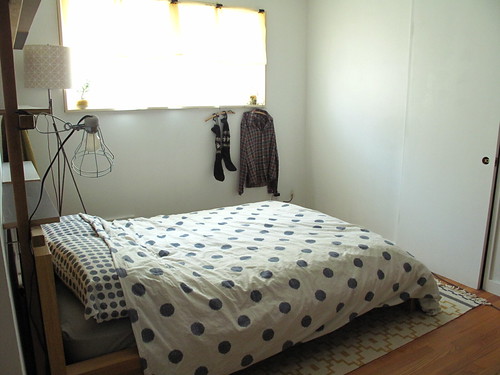
You can see the rest of the home tour with some of our trade secrets on AT, HERE!​

Comment

Comment

Almost Finishing Touches


Finally! We're at the fun part of the kitchen process where we get to start accessorizing!


We gathered some existing thing we had, along with some material & color samples to compose this pallet.

One of the main element we're most excited about is the idea to integrate copper as an accent color & material which we felt would add the prefect amount of warmth to the overall feel.

We initially had these aluminum knobs...which are fine....but something about it just didn't feel very interesting...or special...


We wanted to use vintage knobs and ended up finding these simple standard 50's copper knobs from Second Use to go with our oak and whitened europly cabinet fronts. It's one of those things where we weren't totally sure if it was going to make everything look too dated or out of place....

But once we put them on, the whole kitchen instantly glowed....it was totally the perfect thing that we we're looking for and everything felt 100 times more special and complete! Who would have thought that something as small as cabinet knobs can make such a big difference!

Here's the special nook for our collection of found glass jars with cork tops we've been collecting (I actually more than what's in the photos). I love how the onions even goes with the whole pallet!

I was especially happy to have found couple of these simple copper light sockets to hang above our island area! I was actually debating on whether to splurge on these brass ones from Restoration Hardware for almost $100 each for a simple light socket!! Good thing we waited, did more research, and ended up finding these similar ones from Grandbrass for only 1/10th of the price! I should take that extra cash I saved and buy some bottles of champagne to celebrate this triumphant score!

...we're getting SO close to the finishing line I can smell it! I'm picturing all our friends & family awaits for us at the end with warm towels & hugs....it's gonna be amazing.....


Comment

2 Comments

Kitchen end in sight

We're nearing the finish line with our kitchen and it's starting to feel real nice.

Today we finally got the sink plumbed up and working...no more trucking dirty dishes to the basement to be cleaned in the laundry sink.

We also received our whitened birch cabinet fronts back from the finisher today...they look great!

We're days from presentable overall shots and more details so stay tuned!

2 Comments

Comment

Kitchen progress report

Alright, i know it's been a long time since we've updated on the progress of our kitchen. No, we're not done yet but yes we have made progress (unlike in the the past when we say we're doing but we're actually not). It's actually starting to get frighteningly close to a real kitchen...OH-EM-GEEE!


Comment

Comment

Cabinets IN!

Base on my trend study for this season ... I say that cabinets are totally IN....our kitchen that is.


We're just going with Ikea cabinets, but will finish the fronts with a mix of oak and birch plywood.

Amongst all the cabinets, we integrated an open nook to break up the space, but also just so I can display all my vintage glass jar collection to keep all my dry foods. Dylan drew that in just to see what it'd look like.

Testing our steel hanging bar!

Comment

Comment

Snorting Drywall Dust Phase

As we got to the phase of putting up dry wall & mudding our kitchen,  we soon started to question why we even started this whole kitchen renovation project in the first place!

No one ever warned us about how awful this whole process is!  For only the size of our kitchen, it took us more than a week of hanging the walls, Dylan mudding the walls in the morning, and then me sanding the walls at  late through the night (repeat 3 times)....and on top of that having all the joint compound dust suck all the moisture out of our body.

I only have pictures of the kitchen before it got bad...and before I went crazy.

Then it was just dust....EVERYWHERE.....

...and then it was just me swearing like a sailor and looking like Peg-Pen from Charlie Brown the whole rest of the time...

Comment

Comment

Kitchen Progress Report

We decided to put things into high gear 2 weeks ago on our kitchen. I cutoff nearly all contact with the outside world and started calling in those favors from friends we knew we needed to get the job done.

First Jared and Nick helped me face my fear/lack of competence in electrical work and install all new electrical to the kitchen including the installation of recessed can lighting (so awesome to have now!)
Then my step dad Stan and I spent a day installing solid oak hardwood reclaimed from a friend of ours house. It was a total puzzle to put together but will look awesome and match the existing floor once it's all refinished.
Finally, Nick from Piano Nobile helped us cap off the week with the installation of our steel support frame, which looks and feels incredible in the space. We can really start to get a sense of how the kitchen will actually feel and it's such a huge improvement despite being a complete mess. So excited to get drywall in and start on the cabinets! Heres an overall glimpse of the space:

Comment

Comment

Instant Framing

This was the day we've been waiting for since we started designing a steel frame with Nick from Piano Nobile...we're gonna see the frame in our space for the first time!

I was especially excited to wake up this morning and see Nick pull in with his AWESOME Fuso in our drive way with the frame pieces. Seeing the size of the Fuso, I wished we had bigger pieces to move just so we can see the crane in action, too!!

So remember from our previous post with our Google sketchup of our kitchen with a steel frame?...the frame will act as a load bearing structure between our kitchen and living room so we can open the space up and have an island!

so here are some photos of Dylan & Nick dry fitting the pieces in the space for the first time to see how it all looks and fits....nervous?? I AM!!

Ta-da! Instant framing, done!

It was as simple as lining up the pieces, screw in the bolts and voila!  Totally exciting to see what it actually look like in our space!! I was hopping around like a 5 year old filled with excitement when they were doing all this.

Next on the list....we'll ride the Fuso and get the frame powder coated! Yesssss......

Comment

1 Comment

Demolition Derby


Ahhhhh!!!  We're officially in the kitchen remodel funnel!  Well, technically we're kitchen-less at the moment and I guess technically we could make a decision:  spend every free moment  we have in the next two months laboring over as close to the kitchen of our dreams as our architecture and budget will allow or just live indefinitely without a kitchen...washing dishes in the basement utility sink and learning the fine art of microwave and toaster oven cooking.... 

Sorry, I know everyone and their mother is using instagram photo filters these days, but it's really the only way to make this whole mess of a project look semi-romantic and exciting...

Anyways, last Saturday Jean's brother-in-law and I grabbed our sledge hammers and obliterated the kitchen down to the studs and subfloor.  The space feels so cool now...so open...so raw.  Makes us just want to leave it as is except for the no sink, oven, cooktop, or countertop part. 

The diagonally-laid solid wood subfloor is particularly cool... 


Even our (leaky) temporary sink has some tempting rustic charm...


Wouldn't it be a shame to seal up that hidden neitherland area above the ceiling of our stairs?  It's like a whole other entirely useless room in there!

We're hoping that all this roughing it will be worth it when we finally complete the project.  To keep our spirits and motivation up, we have to continually refer to the sketchup model of the final space.

We're so excited to have an open kitchen that we can actually hang out in!  The center island is going to awesome for prep, eating, and talking.  The low seating area at the back will allow us to utilize our over abundance of dining chairs (ridiculous considering we don't have a dining room).

Framing the island is a steel structure our friend Nick at Piano Nobile is making for us to support the span.  It will be powdercoated steel profiles with an incorporated rail for hanging pots and pans, plants, utensils, etc.

The kitchen will also get all new electrical and a reclaimed oak hardwood floor, new appliances, etc.  So, yeah, it's going to be a long journey, but at this point we don't really have any choice.  ONWARD WITH THE KITCHEN!!

1 Comment

1 Comment

A little progress & serenity in our space...

As we mentioned few weeks before...we've been doing some re-hauling & re-organizing of our space for ourselves and for L&G studio...

Slowly but surely we're making some progress and have moved our bedroom into what was previously our office (or more like our storage)...

It's a smaller space, but I've been loving the idea to downsize our bedroom....keeping it minimal, airy, and peaceful....We painted our room with stock white paint...to replace the previously dingy dirty off white paint....and just changing that, the room felt instantly bigger, brighter and 100 times better!

We kept one side of the wall with the chalk wall from when we painted it for the office....since it'll still be useful for those occasional late night brainstorming sessions we do....plus I didn't' have the heart to erase the adorable messages & drawings by our friends' kids from Japan during the time they stayed with us!!

Then Dylan boxed in the window with soft toned pine boards with a added function as a shallow shelf....so we can incorporate some hanging plants & more plants!... LOVE!!

Then a little added color & pattern from a Ikea area rug for some warmth.Still got few more to add to the space...but overall we're gonna have it pretty paired down...with wood shelving made with cinder blocks and then have ropes & hanging rods to hang my accessories. I like the concept of "organized chaos" and love seeing selective pieces of clothes hung & displayed like that...it makes me appreciate what I have and gets me excited about wearing it...like the my new B&W sweater hanging on the mirror . A recent score at one of the vintage shops by Nationale & Stand Up Comedy in Portland.

This is a rare exception when I wished the whether is slightly colder so I can wear that more often! I've been practically living in it with it being so comfortable to wear!

still work in progress...can't wait to get it done!

1 Comment

1 Comment

Back to the Land Homes (part one)

In the late seventies after a failed attempt to live out of a VW microbus, my Dad had the bright, romantic idea to drop the nomad lifestyle, move to the country, and live off the land. So he did the only sensible thing a twenty-something in that time period could think of, he bought a lone chicken coop on a couple of acres and decided to make it his home. So began years of trials and tribulations that are a prominent part of my family's folklore: a lost cow, brush fires, a roof-climbing goat named Jemima and the transformation of that chicken coop into a modest passive solar home worthy of his back to the land dream.

Like many similar utopian visions of that time, the romance inevitably wore off, practicality set in and we became city dwellers once again, but my Dad still shakes his head and says "I'm so glad I did that." I can't help but feel the same nostalgic romantic feeling from time to time myself. Should we drop everything and head for simple country life?? Could we cut it out in rural life? Scratch that. We'd probably go crazy, but it's fun to think about the possibilities.


While I try to dig up the few photos that were taken of my Dad's own chicken coop transformation, I thought I would share three amazing books that inspired him to take that plunge (and has got me thinking rustic myself). All Their Own, The Craftsman Builder, and Woodstock Handmade Houses

Below are some pic excerpts of some of the exteriors. Interiors (my fav) in part deux.

More scans on Flickr.

I'm just blown away by the creativity, thoughtfulness and resourcefulness that went into these homes. They were built over time and evolved organically with limited resources, but ultimate freedom...it's authentic rustic charm...not the kind you read about in real estate listings...it's genuine character. Geodesic dome on top of a cedar-shaked double-wide character!

(abv) Love the gesture of this structure's roof line...it was actually architect designed and built as his personal hippie home.

The above is built partially into the ground for heating/cooling. The slanted roof runs to the ground to head off the north winds another passive solar feature and one my Dad used on the chicken coop to ward off the Michigan winter winds.

Not exactly sure what's happening here, but I think this is his artist studio/workshop. I could definitely work there!


Sweet treehouse! Me want! The triangular window collage is such a cool feature. Not sure if that staircase is code...

Ok check out Flickr and stay tuned for Part Two.

1 Comment

Comment

A Great Big Mess..For A Great New Start

We've been doing some MAJOR spring cleaning, purging, and re-organizing....and pretty much turning our house upside-down! This was the state of our house shuffling everything around before we had the L&G Spring Vintage Sale! EEEEK!!

Who would have thought that we had this much stuff! (...actually probably everyone else knew except US!) ....we were THIS close on becoming hoarders buried alive...So part of the reason...besides the fact that we had hoarding issues....we also decided to do this purge so we can create a designated working space for L&G!!
This is especially important since Dylan is now OFFICIALLY working on L&G FULL TIME!!
We're gonna take L&G to the next level...make & design more things full time without killing each other!
It's been totally liberating to let go of the things we had. But mostly we're SO excited for all the new changes & the things we'll get to do for ourselves and for L&G!!

Here's what we got planned:

Turn what was previously our bedroom to L&G office:
-Expand our Dansk desk so can be usable on both sides
-Closet will become shipping & supplies area.
-Put a WHOLE wall of shelving with these CHEAP Ikea shelving system.
-Have desk lamps!

Turn what was previously our office/storage to a minimal & cozy bedroom:
-Colors: white, black, natural
-Materials: cheap pine sheets & cynder blocks for shelving, ropes & metal tubes for open hanging racks.
-plants & hanging plants!

Our main source of inspiration for our new spaces...The House Book 1974 by Terence Conran:
This book is one of our favorite go-to book for ideas when we need inspirations for our space...

Love the feel of this photo for our bedroom!!
It would be a total dream come true to have just simple open shelves like this in our office for books, stereo and things...
ahh....more storage ideas...

yah...I'd be perfectly happy if I can just live in this book...

Comment

1 Comment

Starting 2011 With a Big SHABANG! (through our kitchen wall)

HAPPY 2011!!!
L&G started the year with a big bang.....through our wall between our kitchen & living room on New Year's Day!!


This is just PHASE 1 of only-god-knows-how-many-phases-we'll-take-to-do-our-kitchen-remodel project.
We decided that this year we're gonna actually devote some time/effort/$$ for our house that's been a little neglected....
But also we just got tired of the middle wall that divided our living room & kitchen, which made our kitchen feel too closed off since the living room & kitchen is where both of us hang out majority of the time.

So as the first step, we decided to tear some stuff out to start the project.... and also release all the stress built up from 2010!!

Here's what it looked like BEFORE looking from the living room.

Dylan specking the wall to see what's up.
We took some time to tarp everything off...which is always surprisingly time consuming and not very exciting...
But then we started to tear out the first side of the drywall!!
And since I forgot to take photos, let's fast forward past making bunch of dusty mess, making grunting & hammering noises, taking down the upper cabinets and then tearing out the other side of the wall ....
TA-DA...we went through the wall!

Along the way I had to take this photo of this awesome texture, which was previously our 70's mauve colored tiled back splash wall....

Then we noticed that there's a mysterious half beam on the left side....yes, we just opened a whole can of worms.... This is gonna be an interesting challenge....

But here's what it looks like AFTER!

I know!...NOT that impressive looking at all!
Just to warn you, there's gonna be a whole lot of BEFORE/AFTER photos of stuff like this where the 'after' photos are just gonna look worse than before since it's probably just gonna be things getting torn up more and more....but hopefully that will change where the 'after' photos will get better as we get to do more exciting things.
But at least now you can see the whole kitchen from the living room!
The best part is that there's tons of light coming from the living room now, which is totally great!
I'm totally stoked about it even with just this raw-open wall. :D

Now we need to go figure out what to do with that weird half-beam....yikes...

1 Comment

Comment

One Step closer to shelving...


Anyone who has visited our side of the dupe in the past 2+ months may recall the seemingly purposeless white wood textured panels on our wall. The panels were the beginning of our built-in shelving...one of those projects that has taken way too long. We got one step closer recently. Finally, I have 1 shelf of 4 sort-of-kind-of ready. I'm pretending it's ready at least. 3 more to go! Plus notching for the brackets and finishing them.


I am building the shelves using this great bracket system from Rakks and using the wood-textured wall panels (actually planks of primed house siding) as wall panels that hide the the required vertical brackets in the gaps between. The shelves will be lightened white oak and will be adjustable in height using the clever camming action of the Rakks bracket. I'm planning on routing channels in the shelves to partially hide the brackets.

More on the whole project when I finally get the damn thing done.


Comment

3 Comments

Home Improvements!!


Check out our duplex blog, thirty-thirtytwo for some before and afters in our living room and kitchen and flickr for some more shots and details of the current affair of things in our new home. It's shaping up nicely, but still so much work to do.


3 Comments